A clay bar is the single most overlooked step in car care. If your paint feels rough or gritty even after washing, it's covered in bonded contaminants that washing can't remove. Clay barring strips them away and leaves a glass-smooth surface ready for polish, sealant, or ceramic coating.
What Does a Clay Bar Do?
Your car's paint accumulates bonded contaminants that embed into the clear coat. These include:
- •Industrial fallout — Microscopic metal particles from brakes, trains, and factories that rust and bond to paint
- •Rail dust — Iron particles that embed in the clear coat and appear as tiny orange or brown specks
- •Tree sap residue — Even after cleaning, sap leaves a bonded residue that alters the surface texture
- •Overspray — Paint mist from nearby construction or road work that lands on your car
- •Brake dust — Fine metallic particles from your own brakes that bond to paint, especially on wheels and lower panels
A clay bar is a soft, pliable engineered resin that gently shears these contaminants off the surface without scratching the paint. Think of it as an eraser for embedded grime.
The Plastic Bag Test
Not sure if your car needs claying? Use this simple test:
- Wash and dry your car — Start with a clean surface so you're feeling contaminants, not dirt.
- Place a thin plastic bag over your hand — A sandwich bag or produce bag works. The plastic amplifies texture differences.
- Lightly run your covered hand across the paint — If it feels rough, gritty, or bumpy, you have bonded contaminants.
- Compare horizontal vs vertical panels — Hoods, roofs, and trunks collect more fallout than doors and fenders.
If the surface feels smooth like glass, you don't need to clay. If it feels like fine sandpaper, clay barring will transform it.
Clay Bar Types Compared
| Type | Aggressiveness | Reusable? | Best For |
|---|---|---|---|
| Traditional clay bar | Fine to medium | Limited (discard if dropped) | Best results, most control |
| Clay mitt | Fine | Yes (rinse and reuse) | Speed, large panels |
| Clay towel | Fine to medium | Yes | Convenience, beginners |
| Clay pad (DA) | Fine | Yes | Professional speed with DA polisher |
For most car owners, a clay mitt or traditional clay bar are the best choices. Clay mitts are faster and harder to drop. Traditional bars give more control on heavily contaminated areas.
Step-by-Step Clay Bar Process
- Wash the car thoroughly — Clay should only touch clean paint. Any loose dirt will get trapped in the clay and scratch the surface. A proper two-bucket wash or foam cannon pre-wash is ideal.
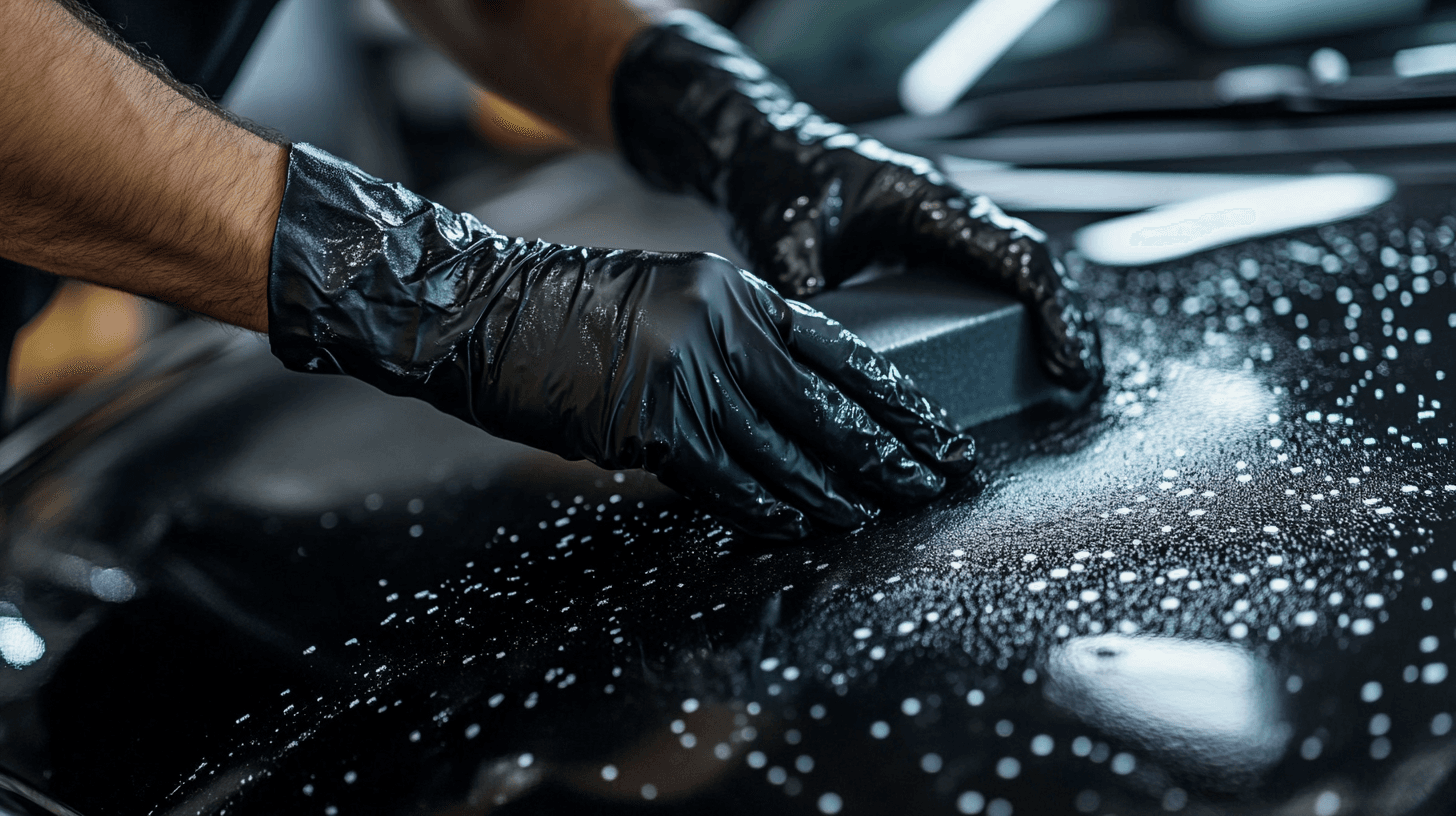
- Work one panel at a time — Spray clay lubricant generously on a 2×2 foot section. The surface must be slippery — never clay dry paint.
- Flatten the clay into a disc — Form it into a flat pad about 3 inches wide. This maximizes surface contact and efficiency.
- Glide the clay with light pressure — Move in straight back-and-forth motions (not circles). Let the clay do the work — pressing hard increases the risk of marring.
- Feel for smoothness — You'll feel the clay grabbing initially, then gliding smoothly once contaminants are removed. That's how you know the section is done.
- Fold and knead the clay — After each section, fold the clay to expose a clean surface. If the entire bar is contaminated, switch to a fresh piece.
- Wipe the panel dry — Use a clean microfiber towel to remove the lubricant residue before moving to the next section.
- Follow with protection — Clay strips any existing wax or sealant. You must apply wax, sealant, or ceramic coating after claying.
Critical Mistakes to Avoid
- ✕Dropping the clay bar — If a traditional clay bar touches the ground, throw it away immediately. It picks up grit and sand that will scratch your paint badly. This is the number one mistake.
- ✕Claying without enough lubricant — The surface must be slippery. If you hear any dragging or squeaking, add more lubricant immediately. Dry claying will leave marring.
- ✕Using circular motions — Straight lines are less likely to create swirl marks. Back and forth, not circles.
- ✕Claying in direct sunlight — Heat causes the lubricant to evaporate too quickly and can make the clay sticky. Work in shade or a garage.
- ✕Skipping protection afterward — Clay removes all existing protection. Leaving the paint bare after claying exposes it to contaminants faster than before.
How Often Should You Clay?
| Situation | Frequency |
|---|---|
| Garaged car, mostly highway | Once a year |
| Daily driver, outdoor parking | 2-3 times per year |
| Near construction or industrial area | 3-4 times per year |
| Before applying ceramic coating | Always (required prep step) |
| Before applying wax or sealant | Recommended for best results |
Clay Bar vs Iron Remover
Iron removers (like IronX or CarPro Iron X) are chemical decontaminants that dissolve iron particles. They're complementary to clay, not a replacement:
- •Use iron remover first — Spray it on, wait for the purple/red bleeding reaction, then rinse. This removes the majority of iron contamination chemically.
- •Follow with clay — Clay removes everything else the iron remover can't dissolve — overspray, sap residue, and other bonded contaminants.
Using an iron remover before claying means the clay stays cleaner longer and you get a more thorough decontamination. Professional detailers always use both.
Final Thoughts
Clay barring is the bridge between washing and protecting. It takes a clean car and makes it truly clean — removing the invisible contamination layer that prevents waxes, sealants, and coatings from bonding properly to the paint.
If you've never clayed your car, run the plastic bag test. You'll be surprised how rough the paint feels. After claying, the difference is dramatic — the surface will feel like glass, and any protection you apply afterward will last significantly longer.